


LED lighting as we essentially know it today, a staple of consumer electronics, traffic lights, and seemingly everything in-between, has been around for generations.
Indeed, it is perhaps precisely because of this, that we should frequently remind ourselves of the technology’s wonders.
Since the late Nick Holonyak (1928-2018) invented the first visible LEDs, or “light-emitting diodes”, at General Electric in 1962, the technology has consistently demonstrated its formidable energy efficiency, longevity, and environmental friendliness.
Indeed, LED lighting is estimated to deliver energy efficiency of roughly 80% to 90%, compared to traditional options.
The relatively little power that an LED requires in order to produce the light it does, helps underscore another one of the technology’s benefits: its versatility. This is further demonstrated by the broad range of LED circuit projects that have been realised over the years.
Why Is It So Crucial to Select the Right Resistor for An LED Circuit?
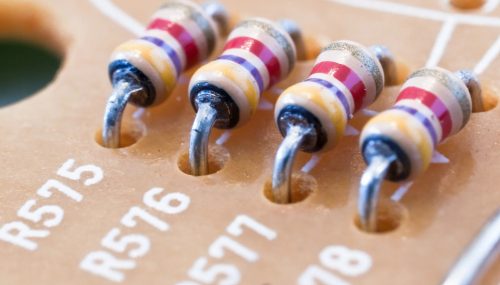 If an LED is used in a circuit without a limiting resistor, there can be a risk of it quickly burning out, due to its operating current rating being quickly surpassed.
So, engineers need to be well-versed in how they can calculate the resistor values needed for adequate protection of the LED.
When the optimal resistor is chosen for an LED in a circuit, an effective balance can be achieved between performance, efficiency, and cost.
What Steps Are Necessary to Determine the Right Resistors for LED Circuits?
If you’re wondering how to calculate the correct resistor for an LED circuit, one option could be to use an LED resistor calculator, as can be swiftly and easily found online.
Even if you do use such an online tool, however, you will still need to have the relevant inputs to hand, including the LED supply voltage (Vs), the LED forward voltage (Vf), and the LED forward current (If). So, let’s outline the essential process to help you understand:
1. Familiarise Yourself with The LED’s Specifications
 By referring to your LED’s datasheet, you will be able to retrieve the specific Vf and If values allowing you to move forward with the calculation. In summary:
- The forward voltage (Vf) is the voltage that the LED requires in order to conduct current and light up
- The forward current (If) is the current at which the LED is designed to operate, normally specified in milliamps (mA)
- The supply voltage (Vs) is the voltage of whatever power source is used, such as the power supply or battery.
3. Calculate The Resistor Value (R)
Figuring out the resistor value you will require for a basic LED circuit, will entail subtracting the forward voltage drop of the LED from the source voltage and applying Ohm’s Law.
The fundamental principle of Ohm’s Law is V = IxR, where those letters are Voltage (in Volts), Current (in Amperes), and Resistance (in Ohms) respectively. For the purposes of calculating resistance, this can be rearranged to R = V/I.
Then, we’ll need to add the terms for LEDs, the aforementioned forward voltage and forward current. The ultimate calculation for the LED circuit, then, will be R = (Vs – Vf) / If.
3. Select The Right Resistor
 As you consider your options for the resistor itself, you will want to be sure of it having a power rating that enables it to handle the power dissipation. In practice, a 1/4W resistor will suffice for the majority of small circuits.
4. Account For LED Configuration
This will be a key factor. If you have multiple LEDs in a series, for example, you will need to add together their forward voltages. Parallel configurations, meanwhile, will necessitate the resistor being calculated individually for each LED.
5. Test And Tweak
By drawing upon the appropriate software tools, you will be able to simulate the LED circuit and verify its performance. If the brightness and efficiency delivered aren’t quite what are desired, you can further adjust resistor values to achieve the optimal results.
Final Thoughts
There you have it, a “cut out and keep” guide to the vital process of deciding on the most suitable resistor for an LED circuit.
Get these steps right, and you can look forward to an impressively glowing LED that also won’t burn out prematurely.


