


What is Google Analytics?
Google Analytics is a web-based service that can analyse and screen the performance of your website. You can see the overview, the number of visitors to your site, and all the other parameters. With this tool, you can optimize your content and website according to user actions and requirements. It is Google sponsored product, and many SEO experts use this tool to analyse their websites. With Google Analytics, you can also integrate and analyse your other google related tools like insights. In this article, we will discuss, how to integrate your WordPress site with Google Analytics.
How to Integrate your WordPress site with Google Analytics?
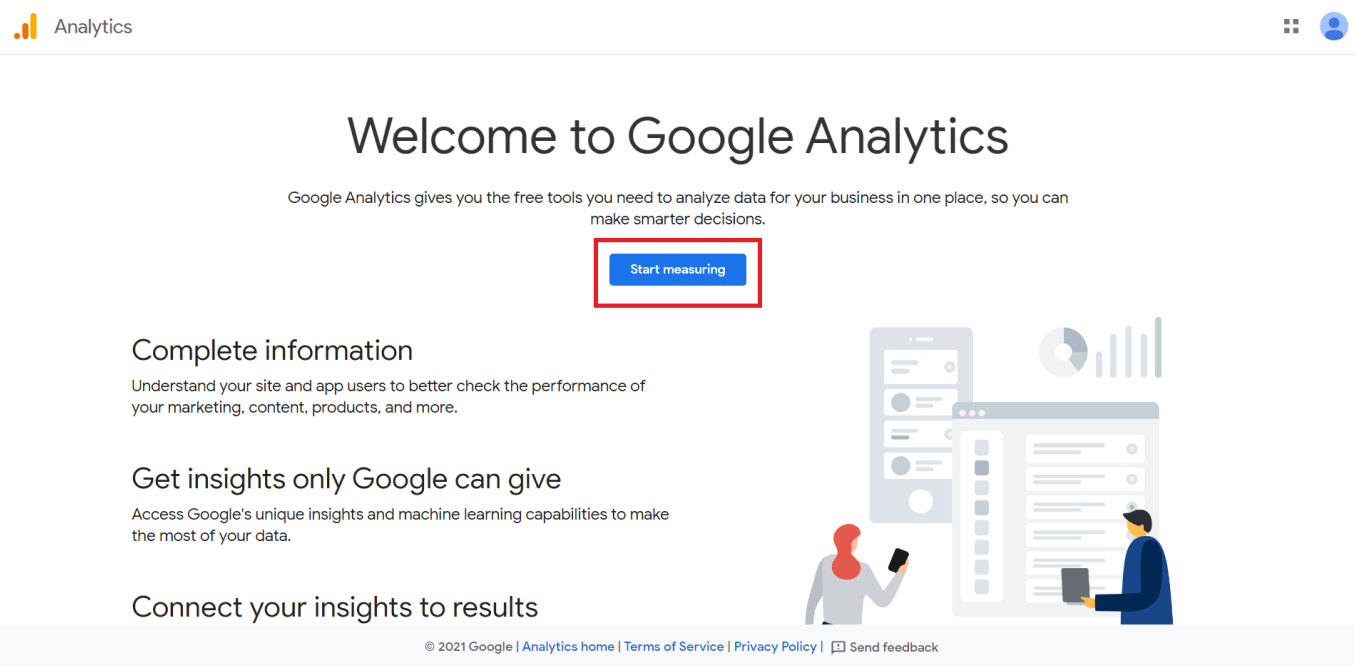
Search for Google Analytics in your web browser and click on the first link to enter the Google Analytics Homepage. Sign in with your personal or official Gmail id and explore the homepage. Here you can see the short description of the tool, after reading that click on Start Measuring to enter the integrating process.
 To integrate your WordPress website, you need to complete three steps, and the first step is to set up your account. On this Account Setup page, you need to enter your account name, use the title of your website which is easy to identify.
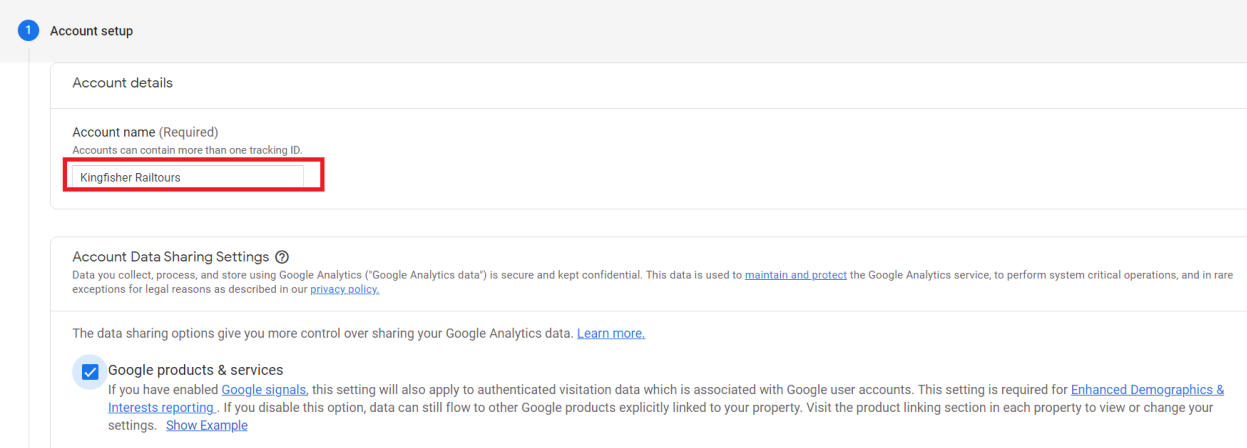 Here, I’ll show you how to complete all the processes practically with images. I took a site from our PBN (Private Blog Network) to learn the process practically, here I’ll give the account name as ‘Kingfisher Railtours’ which is the name of our site. After entering the account name click on the check box Google Services and Products if you need feedback and updates. Then click on Next to enter the next step which is your Property Setup.
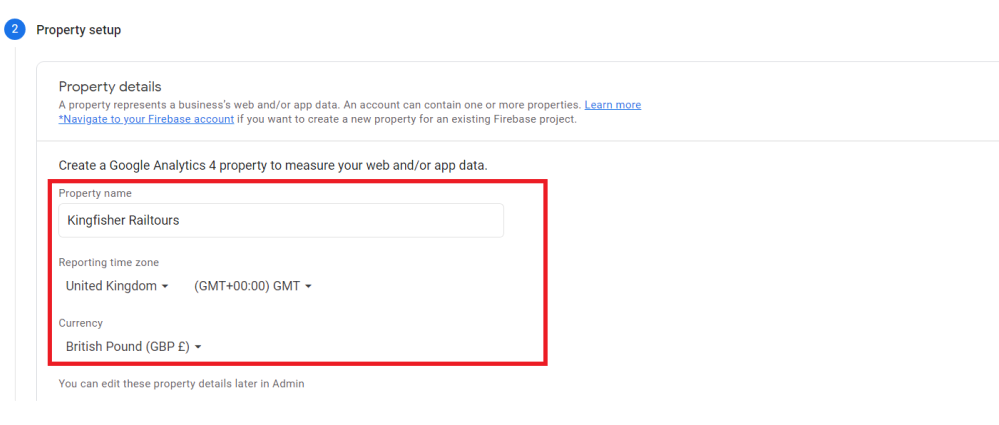 In this section, you need to enter your Property name, the property is your website which you need to track. Select your country, time zone and currency. Click on the Show Advanced options drop-down menu, here you should enter your website URL, and it is used to create Universal Analytics data with Google analytics. But this option is only for the existing user and not for the new users, if you are a new user, you can skip that menu.
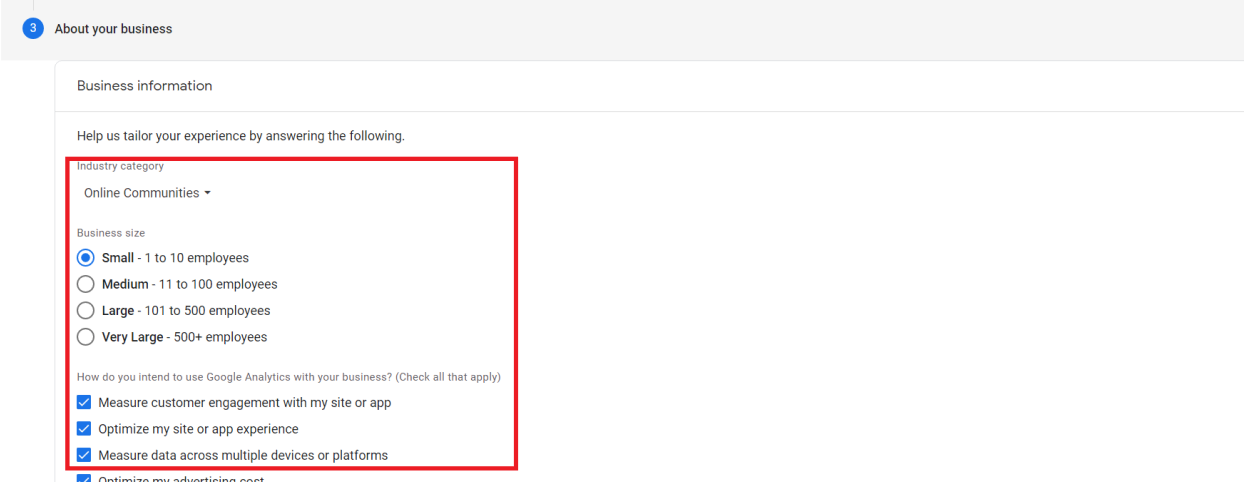 After entering your details click on Next to enter the next step About your Business. In this section, you need to enter the details of your business, i.e., industry category, business size, and your purpose of using Google Analytics, you can click on all the checkboxes if you need all the services. After adding your details click on create to create your property, and you will be shown a dialogue box with Google Analytics Terms & Conditions.
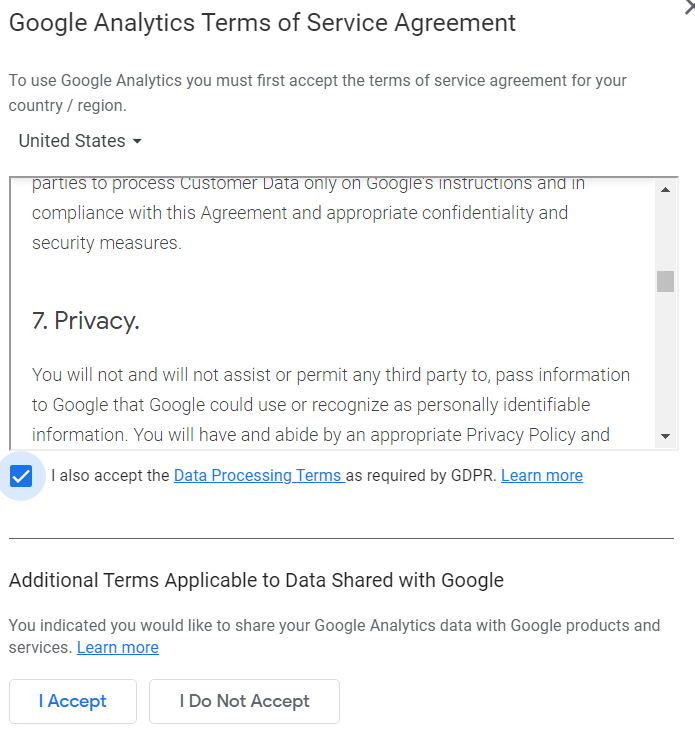 After reading the terms, click on the check box and click I Accept to create your property. After accepting the terms and conditions, you will be directed to the Google Analytics performance analytics page of your website. Check all the email confirmations and click on save.
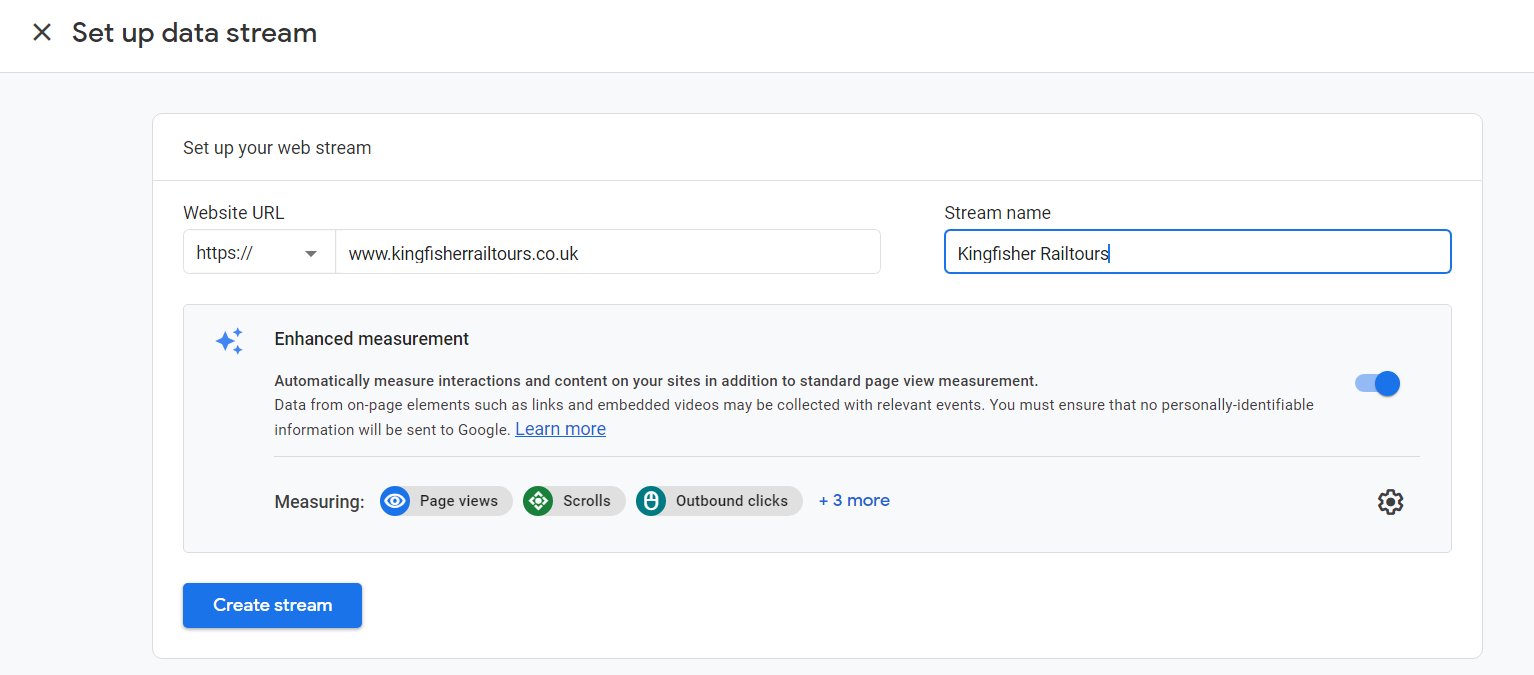
 Your property page will look like this, now you should choose your platform whether it is web-based or a mobile app for android and ios. If your site is web-based, click on the web and you will be directed to the Setup Data Stream page, here you need to enter your website URL and name and click on Create Stream.
 After creating your stream, you will be directed to your Web Stream Analysis page. Here you can see your Stream URL, Stream Name, ID, and Measurement ID which are the unique identities of your property. Here you can see a separate section Tagging Instructions, and this is the important process to integrate your website with Google Analytics.
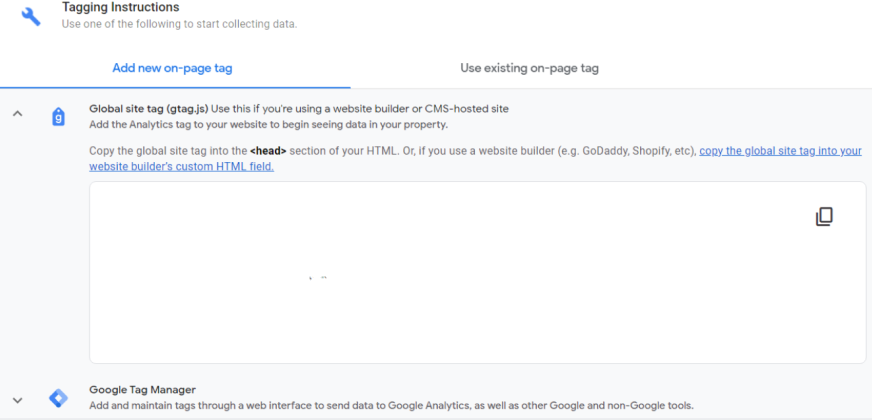
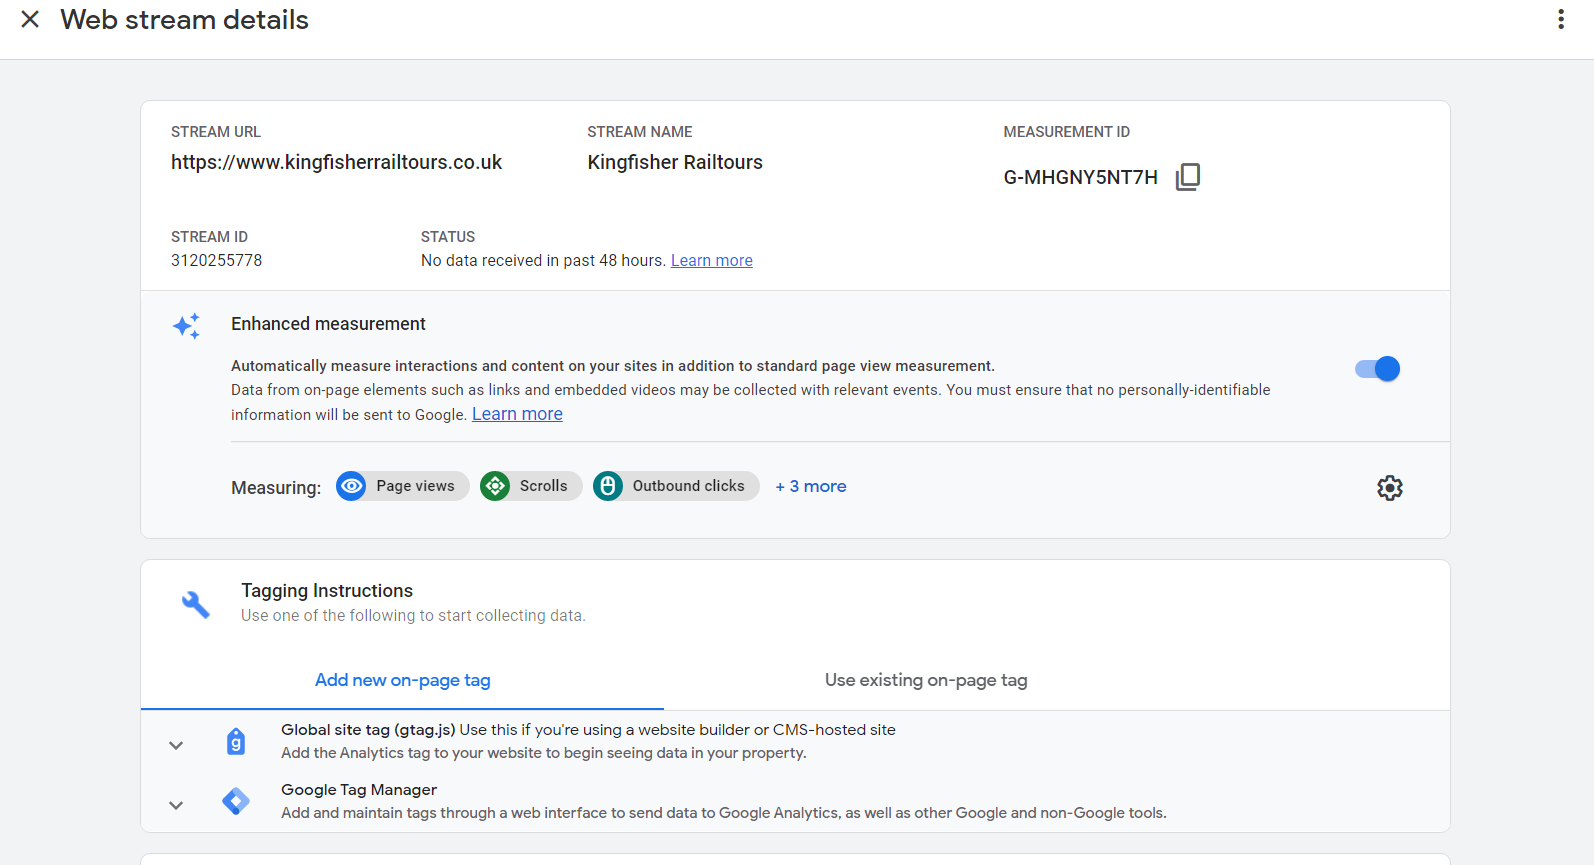 Click on the Global Site Tag drop-down menu and you will find the coding which is to be added to your website. Now copy that code and go to your WordPress website Dashboard.
 Check for Tracking Code Manager Plugin, if it is not there, install and activate a new plugin called Tracking Code Manager.
![]() After installing go to Setting in Tracking Code Manager Plugin, you will be shown like this and select click here to create a new tracking code.
After installing go to Setting in Tracking Code Manager Plugin, you will be shown like this and select click here to create a new tracking code.
![]() Here, you need to give a new name for your tracking code, which I have given as Google Analytics, check that the Active check box is selected, now select the required options in your page and click on Save to activate the new tracking code manager.
Here, you need to give a new name for your tracking code, which I have given as Google Analytics, check that the Active check box is selected, now select the required options in your page and click on Save to activate the new tracking code manager.
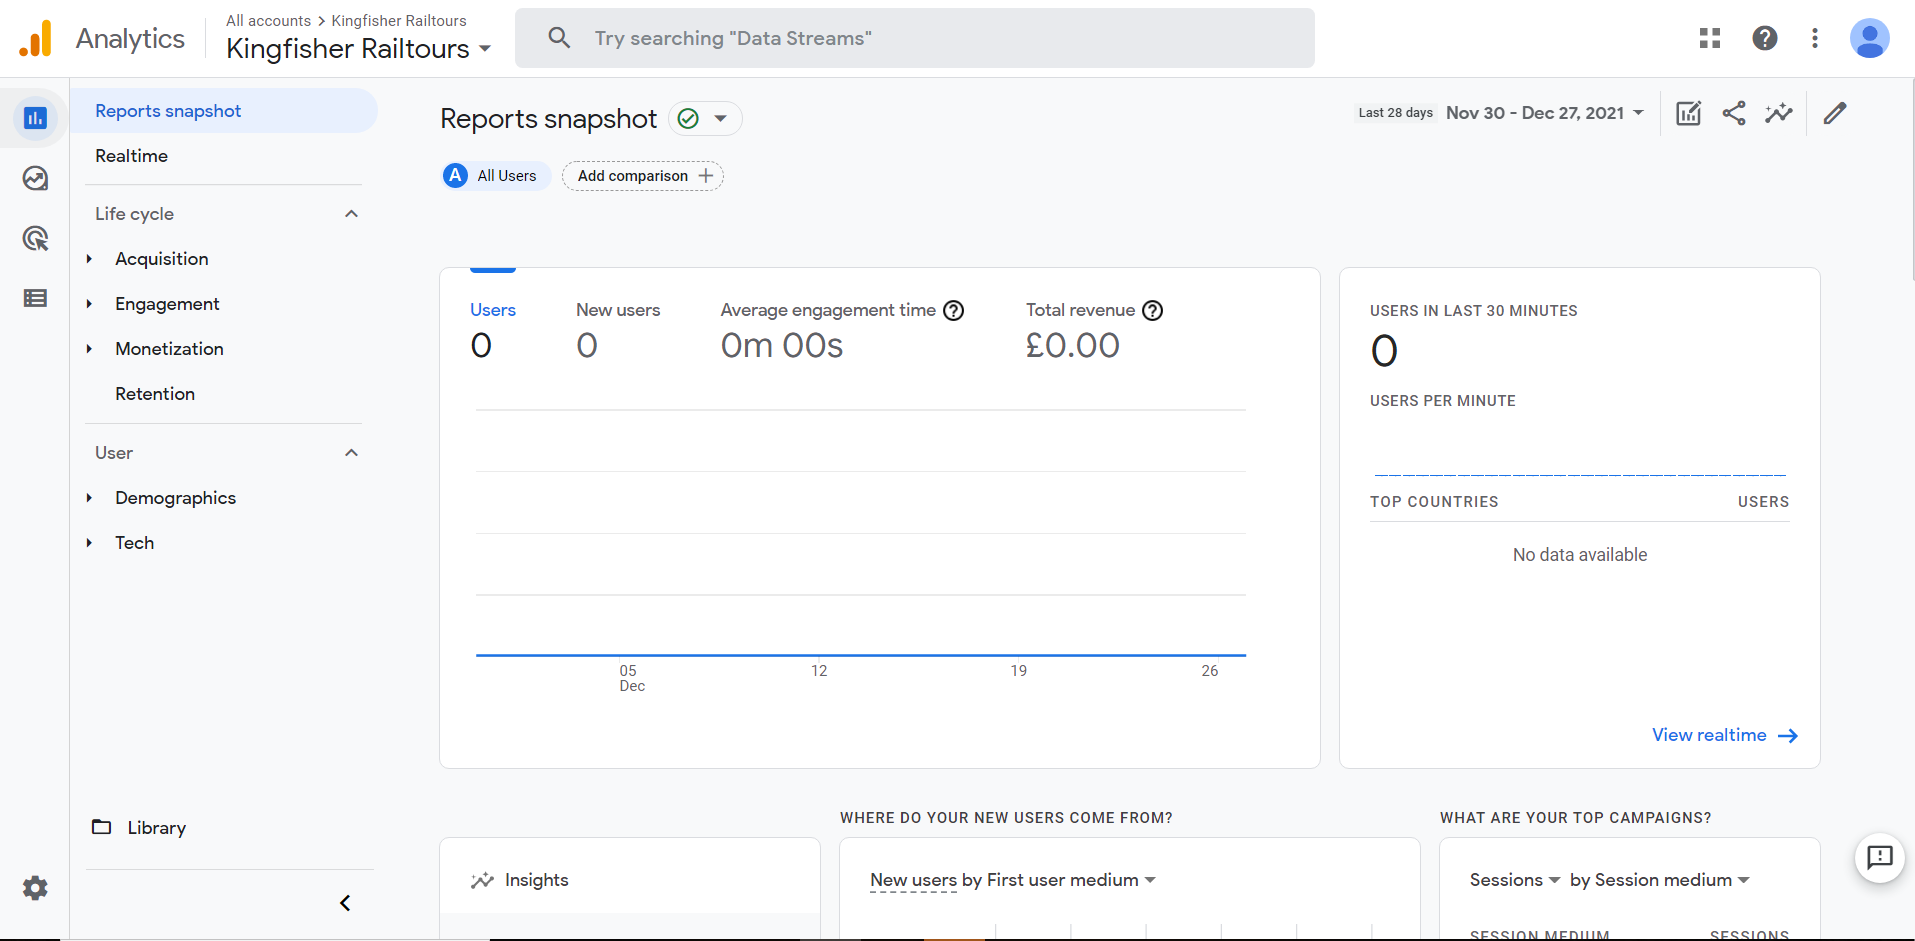 Now Go to Google Analytics and click on the Reports tab to analyse your website performance.


